Home Buyer’s Checklist: What to Inspect Before Moving In
Use this home buyer’s checklist to inspect the roof, plumbing, electrical system, HVAC, safety features, and repairs before moving into your new home.
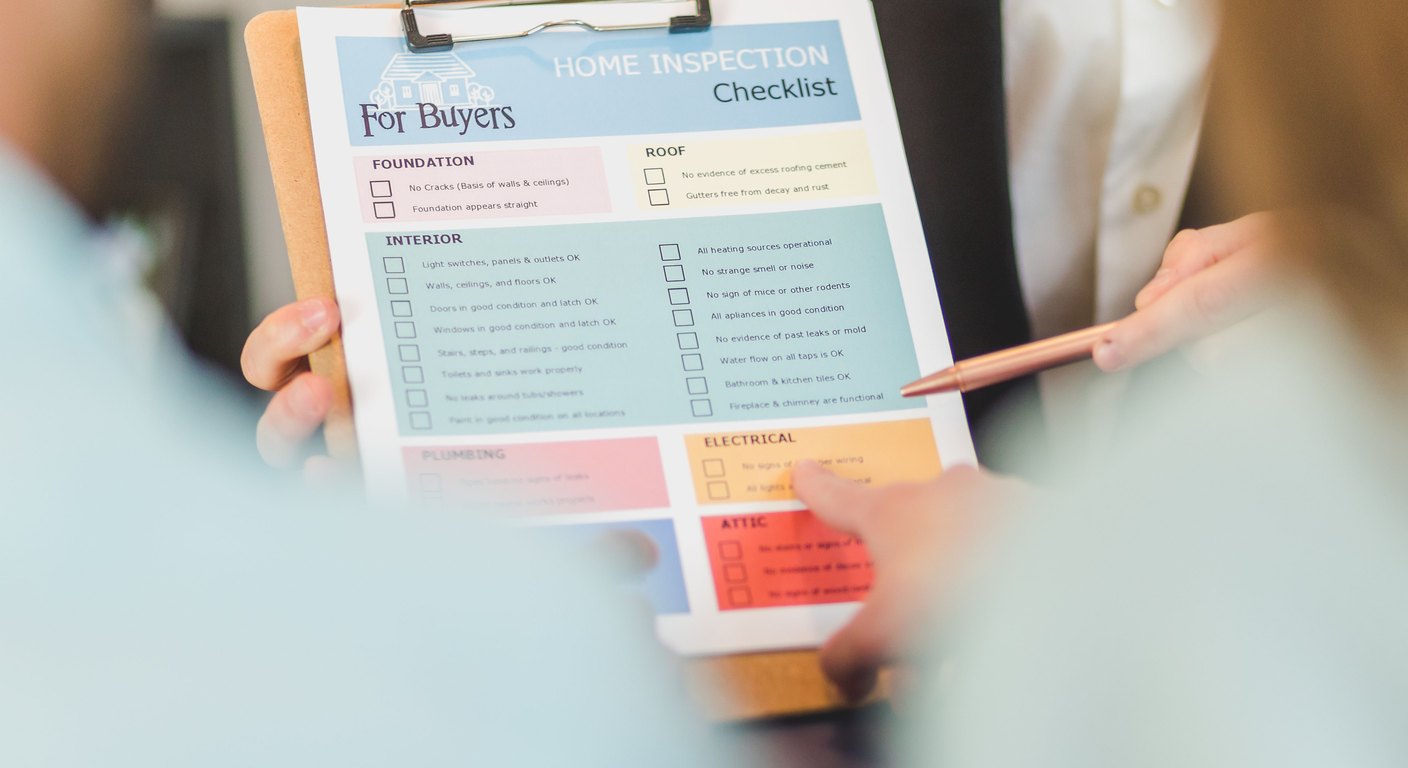
Buying a home is exciting, but move-in day should not be the first time you look closely at how the property works. A careful inspection can reveal leaks, safety concerns, unfinished repairs, and maintenance needs while there is still time to make a plan. It also helps you separate urgent work from improvements that can wait.
Use this checklist alongside your professional inspection report, purchase agreement, and final walkthrough. It will help you verify the major systems, document concerns, and decide what needs attention before movers carry the first box through the door.
Start With the Professional Inspection Report
A buyer’s checklist supports a professional home inspection, but it does not replace one. A qualified inspector can evaluate areas that are difficult or unsafe for a buyer to assess, explain the significance of defects, and recommend when a specialist should take a closer look.
Read the complete report instead of focusing only on the summary. Photos and notes in the body often explain whether a problem is active, a maintenance item, or a condition that needs further evaluation.
Questions to ask about each finding:
- What is the risk? Determine whether the issue affects safety, water resistance, structure, comfort, or normal operation.
- How urgent is it? Ask whether it needs attention before closing, before move-in, or during routine ownership.
- Who should evaluate it? Some findings call for a roofer, electrician, plumber, HVAC technician, engineer, or pest professional.
- What evidence is available? Request receipts, permits, warranties, and photos for work the seller agrees to complete.
Keep the report accessible during the final walkthrough so you can compare previous findings with the current condition.
Inspect the Roof, Gutters, and Exterior
The roof and exterior protect everything inside the home. You can learn a great deal from the ground without climbing onto the roof, which should be left to a qualified professional.
Look for missing, lifted, cracked, or uneven roofing materials. Check whether flashing appears secure around chimneys, skylights, and roof penetrations. Gutters should be attached, free of obvious sagging, and directed toward downspouts that carry water away from the foundation.
Walk around the exterior and inspect siding, brick, stucco, trim, decks, steps, railings, and visible sealant. Watch for peeling paint, soft wood, open gaps, damaged masonry, or vegetation touching the structure. From inside the attic, if safely accessible, look for staining, damp insulation, daylight through the roof deck, or musty odors.
On stucco homes, hairline cracks are common and often cosmetic, but wider cracks, staining, or hollow-sounding patches can mean water is getting behind the finish. A Nevada stucco contractor explains how to tell cosmetic stucco cracks from moisture damage.
If a report identifies roof damage, get the scope and price clarified before scheduling the move. Buyers researching a local specialist can use this information about roof repair millersville md as a starting point, then compare credentials, written estimates, and warranty terms before hiring.
Check the Foundation, Grading, and Drainage
Water should flow away from the house, not collect beside it. Walk the perimeter after rain if possible and look for standing water, washed-out soil, overflowing gutters, or downspouts that discharge beside the foundation.
Small surface cracks do not always indicate a major structural problem, but wide, displaced, horizontal, or changing cracks deserve professional evaluation. Inside, note doors that do not close, sloping floors, separated trim, or repeated cracks above windows and doors. These signs need context from an inspector or structural specialist rather than a guess.
Also inspect retaining walls, basement window wells, sump pumps, and visible drainage systems. Ask how the sump pump is powered, where it discharges, and whether a backup system is present.
Test Plumbing and Look for Water Damage
Turn on every faucet and shower. Check water pressure, hot water delivery, drainage speed, and the condition of visible fixtures. Flush each toilet and watch around the base and supply connection for moisture.
Open cabinets below sinks and inspect the back, bottom, and supply lines. Look for stains, warped material, corrosion, mold-like growth, or fresh paint that could be covering previous damage. Check around the water heater, dishwasher, refrigerator supply line, washing machine, and basement plumbing.
Plumbing items to verify:
- The main water shutoff is accessible and labeled
- Exterior hose connections work and do not leak
- Tubs and sinks hold and drain water correctly
- Caulk and grout are intact in wet areas
- The water heater shows no active leak or severe corrosion
- Exposed pipes are supported and appear undamaged
If the property uses a well or septic system, review the relevant inspection results, service history, and operating instructions before move-in.
Review Electrical Systems and Safety Devices
Test light switches, built-in fixtures, ceiling fans, and accessible outlets. A simple outlet tester can flag common wiring problems, but unusual results should be reviewed by a licensed electrician.
Confirm that the electrical panel is accessible, properly covered, and clearly labeled. Do not remove the panel cover yourself. Note buzzing, burning odors, warm outlets, scorch marks, loose receptacles, extension cords used as permanent wiring, or lights that flicker repeatedly.
Test smoke alarms and carbon monoxide alarms, and replace batteries if their condition is unknown. Confirm that bedrooms have practical emergency exits and that doors and windows lock securely. Locate fire extinguishers or add appropriately rated units to your pre-move shopping list.
Run the Heating, Cooling, and Ventilation
Operate the heating and cooling systems using the thermostat. Listen for unusual sounds, note unusual odors, and check whether conditioned air reaches each room. Review the inspection report for equipment age, visible condition, and recommended service.
Look at the air filter and confirm its size so you can keep replacements on hand. Check bathroom exhaust fans, the kitchen vent, and the clothes dryer vent. These systems should move moisture and exhaust toward the exterior rather than into an attic, wall cavity, or living area.
Ask for manuals, service invoices, warranty documents, and information about fuel or filter requirements. If the home has a fireplace, wood stove, boiler, heat pump, or other specialized equipment, learn how it operates before you need it.
Examine Windows, Doors, Walls, and Floors
Open, close, lock, and unlock a representative set of windows and every exterior door. Check for damaged screens, failed seals, cracked glass, soft trim, loose handles, and gaps that allow light or air through.
Scan ceilings and walls for stains, bubbling paint, patched areas, or cracks that have changed since the inspection. Use your nose as well as your eyes. Musty smells can point to moisture even when the surface appears dry. If you notice one, this guide on how to track down a musty smell walks through the most common hidden sources before you sign off on the walkthrough.
Walk every room and note loose flooring, trip hazards, damaged stairs, unstable handrails, and floor sections that feel soft. If you plan to paint, refinish floors, or replace carpet, complete that work before delivery day whenever possible. Our guide to protecting hardwood floors during a move can help you preserve finished surfaces while the crew is working.
Inspect the Kitchen, Laundry, and Included Appliances
Confirm which appliances and fixtures are included in the sale, then test them during the final walkthrough. Run the oven, cooktop, range hood, dishwasher, garbage disposal, refrigerator, microwave, washer, and dryer when applicable.
Look below and behind accessible appliances for moisture, damaged cords, loose hoses, or heavy dust near vents. Confirm that the dryer exhaust reaches the exterior and that the refrigerator water connection does not drip.
Open cabinets and drawers to check alignment, damage, and signs of pests. Test countertop outlets and verify that sinks, sprayers, and disposals drain without leaking. Record model and serial numbers for major appliances so future service calls are easier.
Walk Through the Attic, Basement, Crawlspace, and Garage
Secondary spaces often reveal conditions that are less obvious in finished rooms. Only enter areas that are safe and accessible.
In the attic, look for roof staining, compressed or missing insulation, blocked vents, pest evidence, and bathroom fans exhausting into the space. In a basement or crawlspace, check for moisture, standing water, damaged insulation, wood deterioration, or unusual odors.
In the garage, test the door from the wall control and remote. Confirm that the safety reversal works, inspect the door between the garage and house, and look for exposed wiring or signs of water entry. Make sure stored belongings do not block the electrical panel, water shutoff, HVAC equipment, or emergency exits.
Confirm Repairs, Permits, Warranties, and Keys
Do not rely on a verbal statement that work is complete. Ask for written documentation and inspect the repaired area during the final walkthrough.
Documents and handoff items to collect:
- Paid invoices and contractor contact information
- Transferable warranties for the roof, appliances, windows, or mechanical systems
- Permits and final approvals when applicable
- Manuals, remote controls, access codes, and smart-home instructions
- Keys for exterior doors, mailbox, garage, gates, and sheds
- HOA information and utility contact details
If repairs are incomplete or the property’s condition has changed, document the concern and contact the appropriate real estate professional before closing. Do not assume a problem can be resolved after the moving truck is booked.
Complete a Focused Final Walkthrough
The final walkthrough is your opportunity to confirm that the property is in the agreed condition. It is not a second full inspection, but it should be deliberate.
- Bring your documents. Have the inspection report, repair agreement, and purchase contract available.
- Check agreed repairs. Compare invoices and photos with the actual work.
- Test major systems. Run water, lights, HVAC, locks, and included appliances.
- Look for new damage. Check walls, floors, doors, and areas previously covered by furniture.
- Confirm the home is empty. Inspect closets, cabinets, attic access, garage, sheds, and outdoor areas.
- Photograph concerns. Capture wide and close views and note the exact location.
Bring a phone charger, flashlight, tape measure, notepad, and outlet tester. Allow enough time to check the property without rushing to the closing appointment.
Prioritize Work Before Moving Day
Not every finding needs to delay the move. Sort tasks by risk and by how difficult they will be once the house is furnished.
Address first:
- Active roof or plumbing leaks
- Unsafe electrical conditions
- Failed exterior locks or broken windows
- Missing smoke or carbon monoxide alarms
- Heating or cooling failures during extreme weather
- Pest activity or significant moisture problems
Complete before furniture arrives when practical:
- Deep cleaning
- Interior painting
- Floor refinishing or carpet replacement
- Major drywall repairs
- Closet or storage improvements
- HVAC duct or dryer vent cleaning when recommended
Cosmetic updates, landscaping changes, and optional upgrades can usually wait until you understand how you use the home.
Coordinate contractors and movers so they are not competing for the same rooms, driveway, or access points. Review our week-by-week moving checklist to schedule utilities, packing, repairs, and delivery in the right order.
Home Buyer’s Pre-Move Checklist
Use this condensed list during your inspection review and final walkthrough:
- Read the full inspection report and specialist findings
- Verify agreed repairs and collect invoices or warranties
- Inspect the roof, gutters, siding, grading, and drainage
- Look for foundation movement and signs of water intrusion
- Test faucets, toilets, drains, and visible plumbing connections
- Run lights, outlets, HVAC, ventilation, and included appliances
- Test smoke alarms, carbon monoxide alarms, locks, and garage safety reversal
- Open windows, doors, cabinets, and drawers
- Check walls, ceilings, floors, attic, basement, crawlspace, and garage
- Photograph and report any new or unresolved concerns
- Collect keys, codes, manuals, permits, and service records
- Schedule urgent repairs, cleaning, and floor work before delivery
- Protect finished surfaces and plan where movers should place furniture
If the property is a recent build, use our guide to moving into a new construction home for additional walkthrough, warranty, and finish-protection tips.
The Bottom Line
A careful pre-move inspection gives you a safer, more predictable start in your new home. Review the professional report, test the systems you will rely on, document unfinished work, and handle disruptive repairs before rooms fill with boxes. You will move in knowing what needs immediate attention and what can wait.
Once the house is ready, compare moving quotes and choose the service level that fits your timeline, access needs, and household size.
Frequently Asked Questions
What should a home buyer inspect before moving in?
Is a final walkthrough the same as a home inspection?
What problems should be fixed before moving furniture in?
What should I bring to a final walkthrough?
How can I document problems found before move-in?
Our team of moving experts creates practical, research-backed guides to help make your next move easier.
Related Articles
Long Distance Moving: How to Coordinate Your Vehicle and Household Move
Learn how to coordinate your vehicle and household move for a long-distance relocation, from one master timeline to delivery windows and arrival-day choreography.

Shipping a Car vs Driving It During a Long-Distance Move
Compare shipping a car vs driving it during a long-distance move, including costs, timing, wear and tear, auto transport options, and how to decide.
How to Prepare Your Car Before a Long-Distance Move
Learn how to prepare your car before a long-distance move, from maintenance checks and tire inspections to packing an emergency kit and planning your route.